Showing posts with label room makeovers. Show all posts

Wednesday, January 13, 2021

Kitchen and Dining Room Makeovers

Recently I posted about a change that I'd made in my dining room. Prior to Christmas, I had a media cabinet in the dining room serving as a buffet, except it's filled with DVD's and CD's. It looked like this:


 However, after Christmas I moved the baker's rack from the kitchen and put it in the dining room.


I fitted it with my fancy dishes and some serving pieces, and I love the way it looks - plus, it makes more sense to have this in the dining room instead of a media cabinet. But you might be wondering why I took it out of the kitchen in the first place. The answer is this:


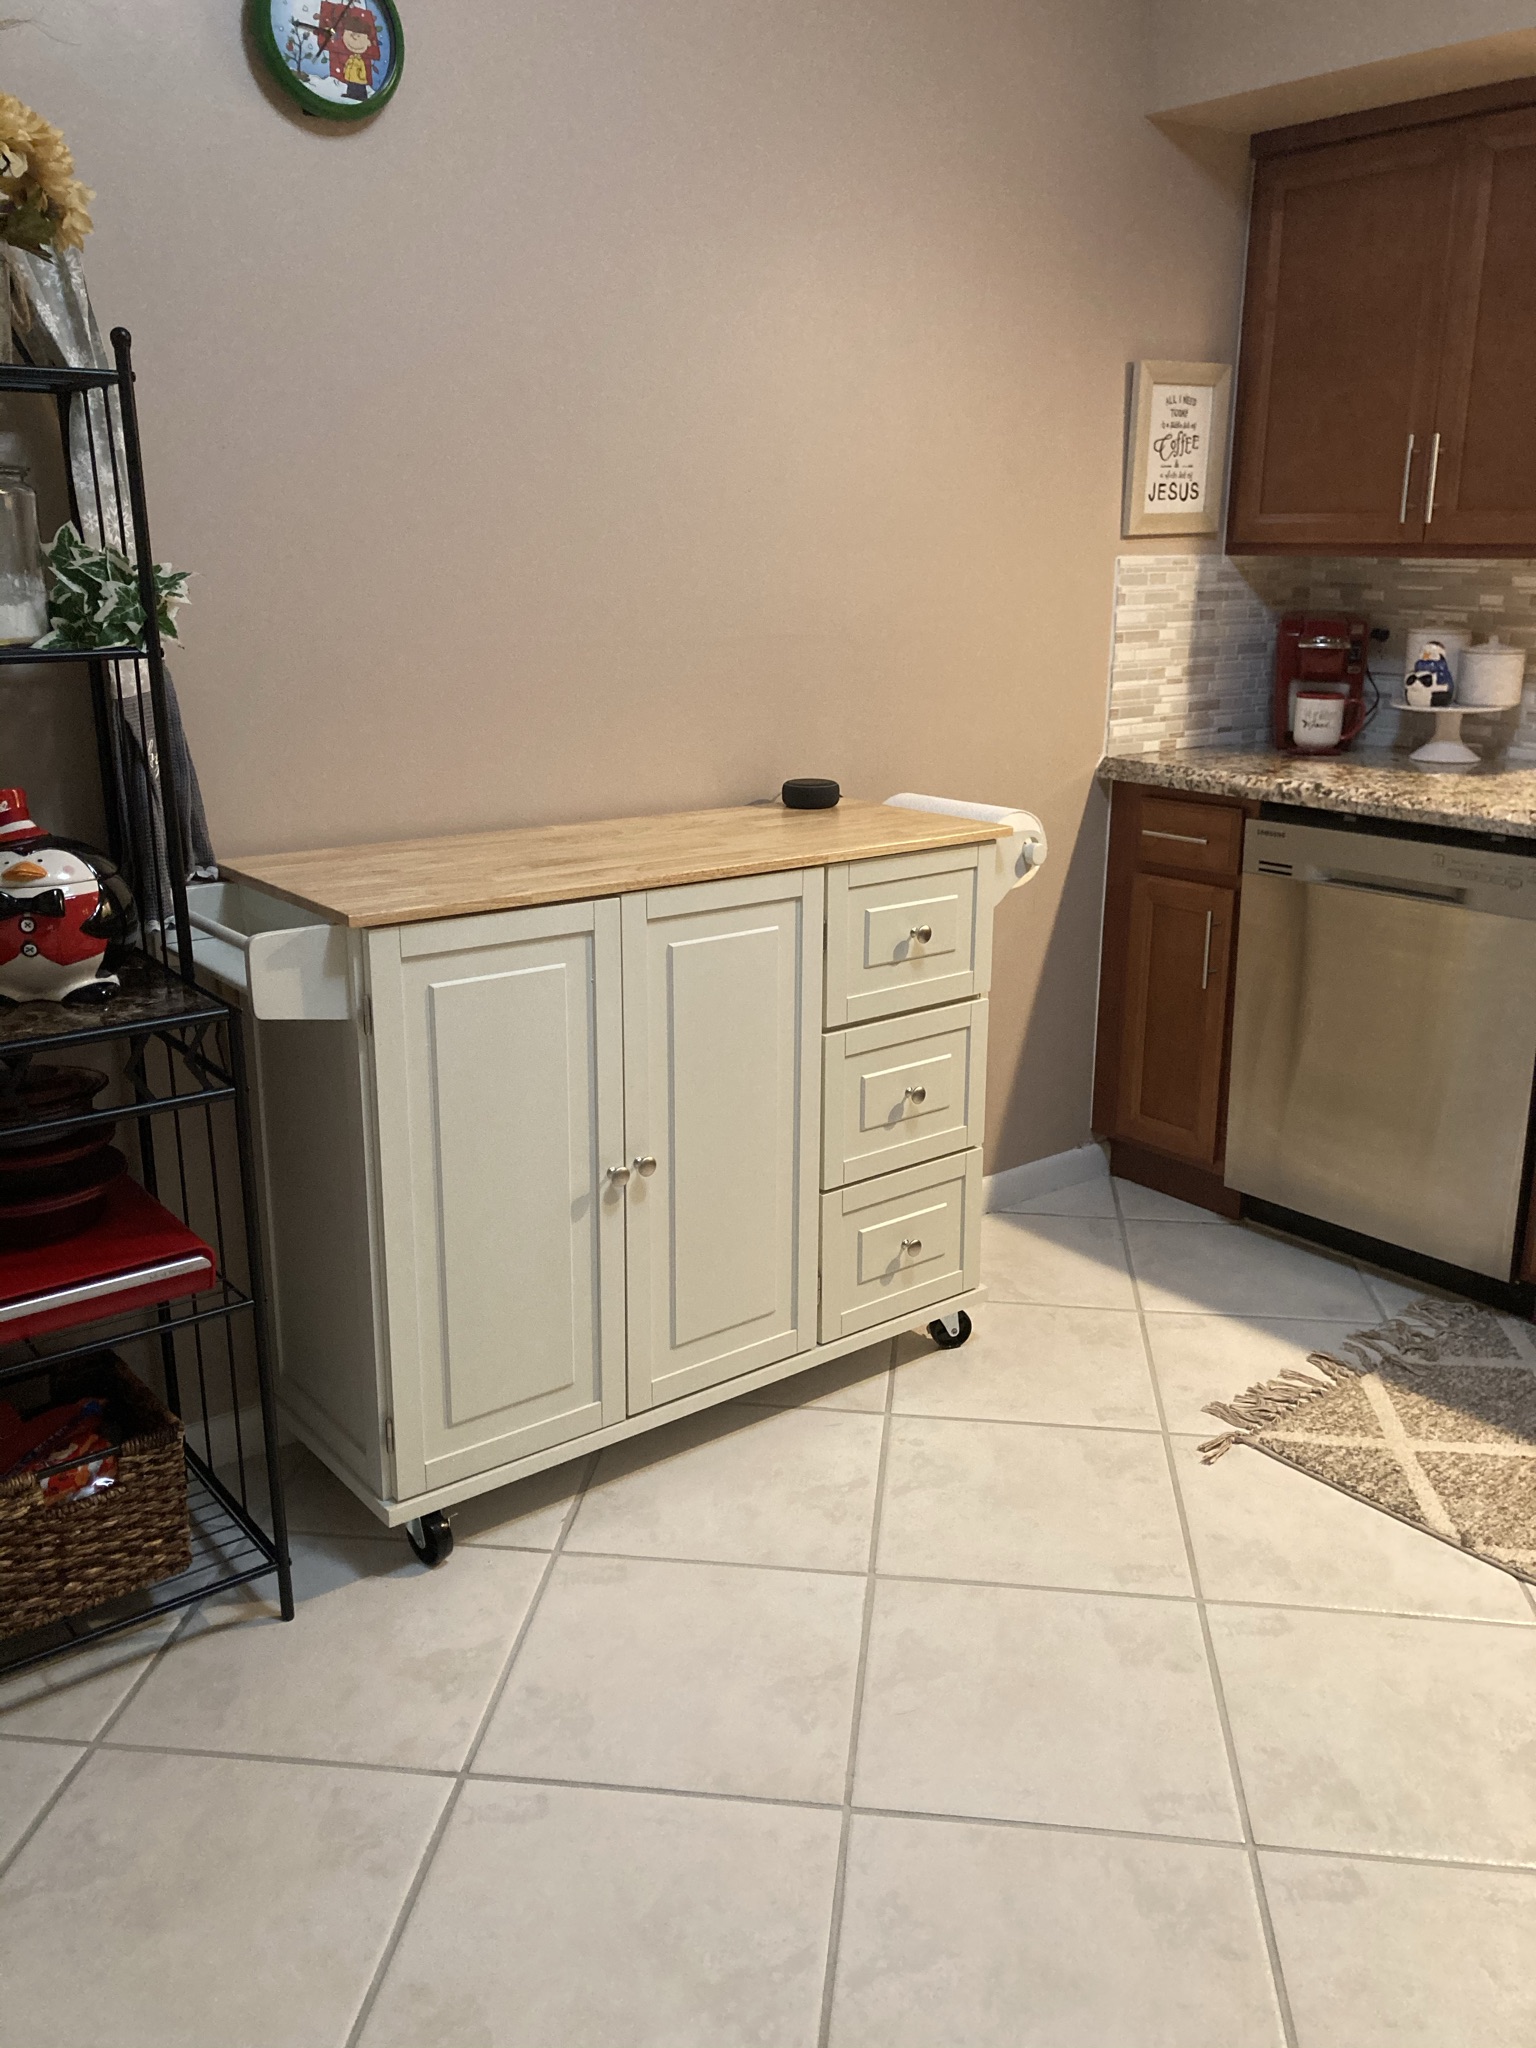
What is this mess you ask? Why, it's a project! Actually, it's my Christmas gift from my daughter and son-in-law. They gave me a kitchen island! I'd told my daughter months before that I wanted a kitchen island because my kitchen, while comfortable and very pretty, doesn't have a whole lot of counter space. In my old house I had a peninsula that was about 8 or 9 feet long, so I had tons of food prep space. This kitchen is much smaller, with less counter space, so prepping food was a bit more challenging. I'd looked at some kitchen islands on Amazon and was considering building one from premade cabinets from Lowe's, when my wonderful daughter gave me this one. I couldn't wait to put it together! No really, I love putting furniture together and building stuff. I'm weird like that.


I was surprised at how easy this island was to put together. If you're interested, this is the Home Styles Liberty Kitchen Cart with Wood Top from Amazon. It's available in black or white; mine, as you can see, is white. It's pretty solid and well made.


I meant to take more pictures putting it together, but once I get in the zone I forget about those things. It didn't take me very long to assemble; not counting pauses to eat or take care of other things, it probably took me 1 - 1 1/2 hours. I only had my son help me twice - once to turn it over, and then again whenever I put the top on because it was too heavy for me alone. Otherwise it was really easy and the instructions were clear.


I was pleasantly surprised at the amount of storage space in this cabinet. I'm especially glad that it has three drawers, since my kitchen only has two drawers. That, in my opinion, was a design flaw by the previous owner whenever she remodeled the kitchen. Two small drawers in a kitchen aren't enough storage for silverware and cooking utensils, let alone anything else that could go in a kitchen drawer. This island gives me plenty of space so that I have things close at hand whenever I'm cooking.

Of course, what I mostly wanted this island for was counter space, and this one didn't disappoint.


On the back of the island is a flap of wood. It can be kept down this was to save space. Then, whenever I need more counter space,


it can be extended out! It almost doubles the counter space, which is wonderful!

I put it in the kitchen right after Christmas but before I'd taken down all the Christmas decor. It was a bit tight and too cluttered for me, which is why I took down my Christmas decor a little earlier than usual.


Before I put the baker's rack in the dining room I moved whatever I could into the island to see how it would fit. 


I got so much stuff in there without having it crowded. I've moved some things out and put other things inside since this picture was taken, based on my needs, but it still fits everything comfortably. Once I moved the baker's rack to the dining room, I decided on what I wanted to do next.


Originally I'd intended to put up floating shelves above the island for storage, but once I realized how well everything fit in the island I decided against it. I didn't want to put up shelves just to put random items up that had no use, other than to collect dust. Instead, I shopped my house for decor for this area.


I got this Gather sign from Kirkland's years ago on clearance. I had it over the bookshelf in the office, but I decided it would look better here. I also put the clock that was here previously just above it, and I really like the way it looks.

And, in case anyone's wondering, the media cabinet found its way into my bedroom.


I don't have a tv in my bedroom, nor do I want one, but I like how this fills in this spot. I love this media cabinet and didn't want to get rid of it, so I knew I would find a place for it. 

So I guess it's really three rooms that got a mini makeover! Just wait, there's more to come. 

Wednesday, September 2, 2020

The Itch To Switch

 One of my favorite YouTubers is Ashley from Til Vacuum Do Us Part. She loves switching her furniture and bedrooms around to create a new look, a process she calls the Itch to Switch. I know that itch only too well. As a teenager living with my parents, I would often rearrange the furniture in the living room. Thankfully my mom didn't mind; she knew I'd clean as I went, and she wasn't going to stop me :D. We switched bedrooms a few times, though it was hard because there wasn't a whole lot of space in the hallway of our apartment. Once I was married and had a home of my own, moving furniture and decor or painting a room became so commonplace it didn't surprise anyone. 

When we first moved into our new home, I set up the living room furniture similar to how the previous owner had hers set up. The sectional was against the stairwell. It worked perfectly, especially at Christmas because I wanted the tree over by the sliding glass doors.


When the spring came around and we were stuck at home because of the shelter in place order, I got the itch to switch. I flipped the sectional and put it in front of the sliding glass doors.


I really do like it in this configuration. It's open and welcoming whenever you come up the stairs. But as I began thinking of fall and winter, the holidays and the decor changes, I got the itch to switch again. The Christmas tree, I believe, looks best in the corner by the sliding glass door. Granted, Christmas is still over 3 months away, but I start decorating for fall in a couple of weeks. I couldn't help wanting to start the new season with a fresh look. The itch to switch took over and the rearranging began.


I started by  moving all the furniture off the rug and giving it a good vacuum (pause to appreciate vacuum lines). I got this rug from Costco, I wanna say three or four years ago, and it has held up beautifully. 


I pulled the cushions off the sectional to make it easier to move, and while I was at it I vacuumed underneath. No matter how careful I try to be, dust and crumbs get in there.


I lifted the coffee table to make it easier to move off the rug, and found this under it. My son E's drawings from when he was about three years old. You can't leave them alone for a second, y'all!


I should mention that I was doing this on my own; my son E was still asleep. I don't mind doing this by myself; I'm thankful I still have the strength and ability to do it. Unfortunately, you don't always catch the mistakes until afterwards. Everything looked good so far so I continued moving furniture.


I brought the chair and ottoman over and set it up like it was before but on the opposite side of the living room. 

I replaced my current decor because I'm not ready to start decorating for fall yet. By now I was pretty satisfied with how the living room looked and I began focusing on the dining room. 

My dining room table is a six seater with a removable leaf. Whenever I put the sectional in front of the sliding glass doors, I took the leaf out of the table to make it smaller.


Now that the sectional was switched, I felt like the table looked too small. So I got the leaf and added it to the table. I also changed the configuration of the chairs so they fit properly on the rug.


 By this time, as you can imagine, I was tired. The furniture is heavy, I was cleaning as I went, and I needed a break. I went and fixed lunch, woke my son up for school, and went about my day. As I did, I began to notice something that really bugged me.


It's probably hard to tell from this picture; it might be something that would only annoy me. But the rug was not centered. I don't think it's very noticeable unless you see it in person. The rug was over to the far right instead of being centered in front of the fireplace and bookcases, which then caused everything else to be off-center as well. Every time I walked by I saw it and I knew I was gonna have to fix it, but by then my neighbor was home from work and moving heavy furniture around would disturb him. I waited till this morning and got to work again.


Moving the rug meant moving all the furniture off the rug again, scooting it over and putting everything back. I should have take better pictures, sorry about that. I moved the furniture a bit more to the center and moved the chair and ottoman further back. It looks more balanced now which was what was lacking before. While I was at it, I took my olive tree from the kitchen and put it here in the corner. I really like how it looks. I don't know if it'll stay here permanently; it might go back before the day's end, but I'm enjoying it in the meantime.

I like switching my furniture for two reasons. First, it gives the room a new look without spending any money, and if I don't like it I can switch it back. Second, it allows the furniture to be used more evenly. Let's be honest, everyone has their favorite spot on the couch. Whenever you sit down it's always in the same place. If you look at someone's couch, you can see where that spot is because that's where most of the wear on the furniture is. By moving my sectional around I'm forced to change my favorite spot; it's technically the same spot in the room, just not the same spot on the furniture piece. I also rotate my cushions once a month so that they too wear out evenly. I find this gives the furniture a longer life.

This won't be the only itch to switch going on in my house this month. Fall is coming, and that means pumpkins and pillows and throw blankets, oh my! Come back soon!  

Tuesday, August 11, 2020

We Interrupt This House Tour To Bring You...

 ...a laundry room makeover! In my previous post (you can read it here) I mentioned that I'd ordered a few things to update and make my laundry room (actually, laundry closet) into a room I liked looking at. I got my order on Thursday but I was dog sitting for my daughter who spent the weekend at Disney World with her husband and some friends. I didn't want to make a mess in the house while having a dog underfoot (and I mean that literally; he follows me everywhere). So I decided to get started on the work Monday morning.

I started by taking everything off the shelves, hooks, and the top of the dryer where I keep a laundry basket. I took down the shelves and gave them a good cleaning.

I took the covers off the electric outlets as well. I thought about switching out this outlet; the color is so dingy, like much of what was in this laundry closet. Ultimately I decided I wouldn't tackle that project just yet, not because I don't know how but because I was doing this on a budget and I hadn't planned on it. The outlet covers are less than $4 which was no biggie. I took a quick trip to Home Depot and got the covers along with a saw for a project I hope to do at my daughter's house. 

I took a quick pic of the wall before taking the washer and dryer out. Y'all, it looked awful! I was really looking forward to covering all this nastiness. But, floors first.

I spared y'all the worst of it. This is after having scrubbed the floor and baseboards with Krud Kutter, which I highly recommend. This product actually cleaned the linoleum better than anything I'd tried before. The stains, unfortunately, are there to stay. I decided not to paint the baseboards because they're hidden behind the appliances. The floor is too, and I actually considered tiling only the front that would be seen, but it's such a small space and I didn't want the machines to be on an uneven surface. 

I used vinyl peel and stick tiles. They are easy to use, easy to cut, and look really nice. This part of the project took about an hour to complete, and I'm thrilled with the results.

Isn't it gorgeous?!?! I will say this, these tiles are not the best for a high traffic area. The instructions say not to use any additional adhesive, but I don't see how you can get away with just the adhesive that's on the tile. The edges do not stick very well. I had to stand on them and press hard, and even then some did not stick as well. Since these are going under my washer and dryer I was not overly concerned, but in a kitchen or hallway where there is a lot of foot traffic, these may not be the best choice. They look and feel beautiful, though, and it really did update the room considerably. Oh, the black marks on the wall? That's caused by the washer hose. I tried cleaning it with a Magic Eraser. It would not budge.

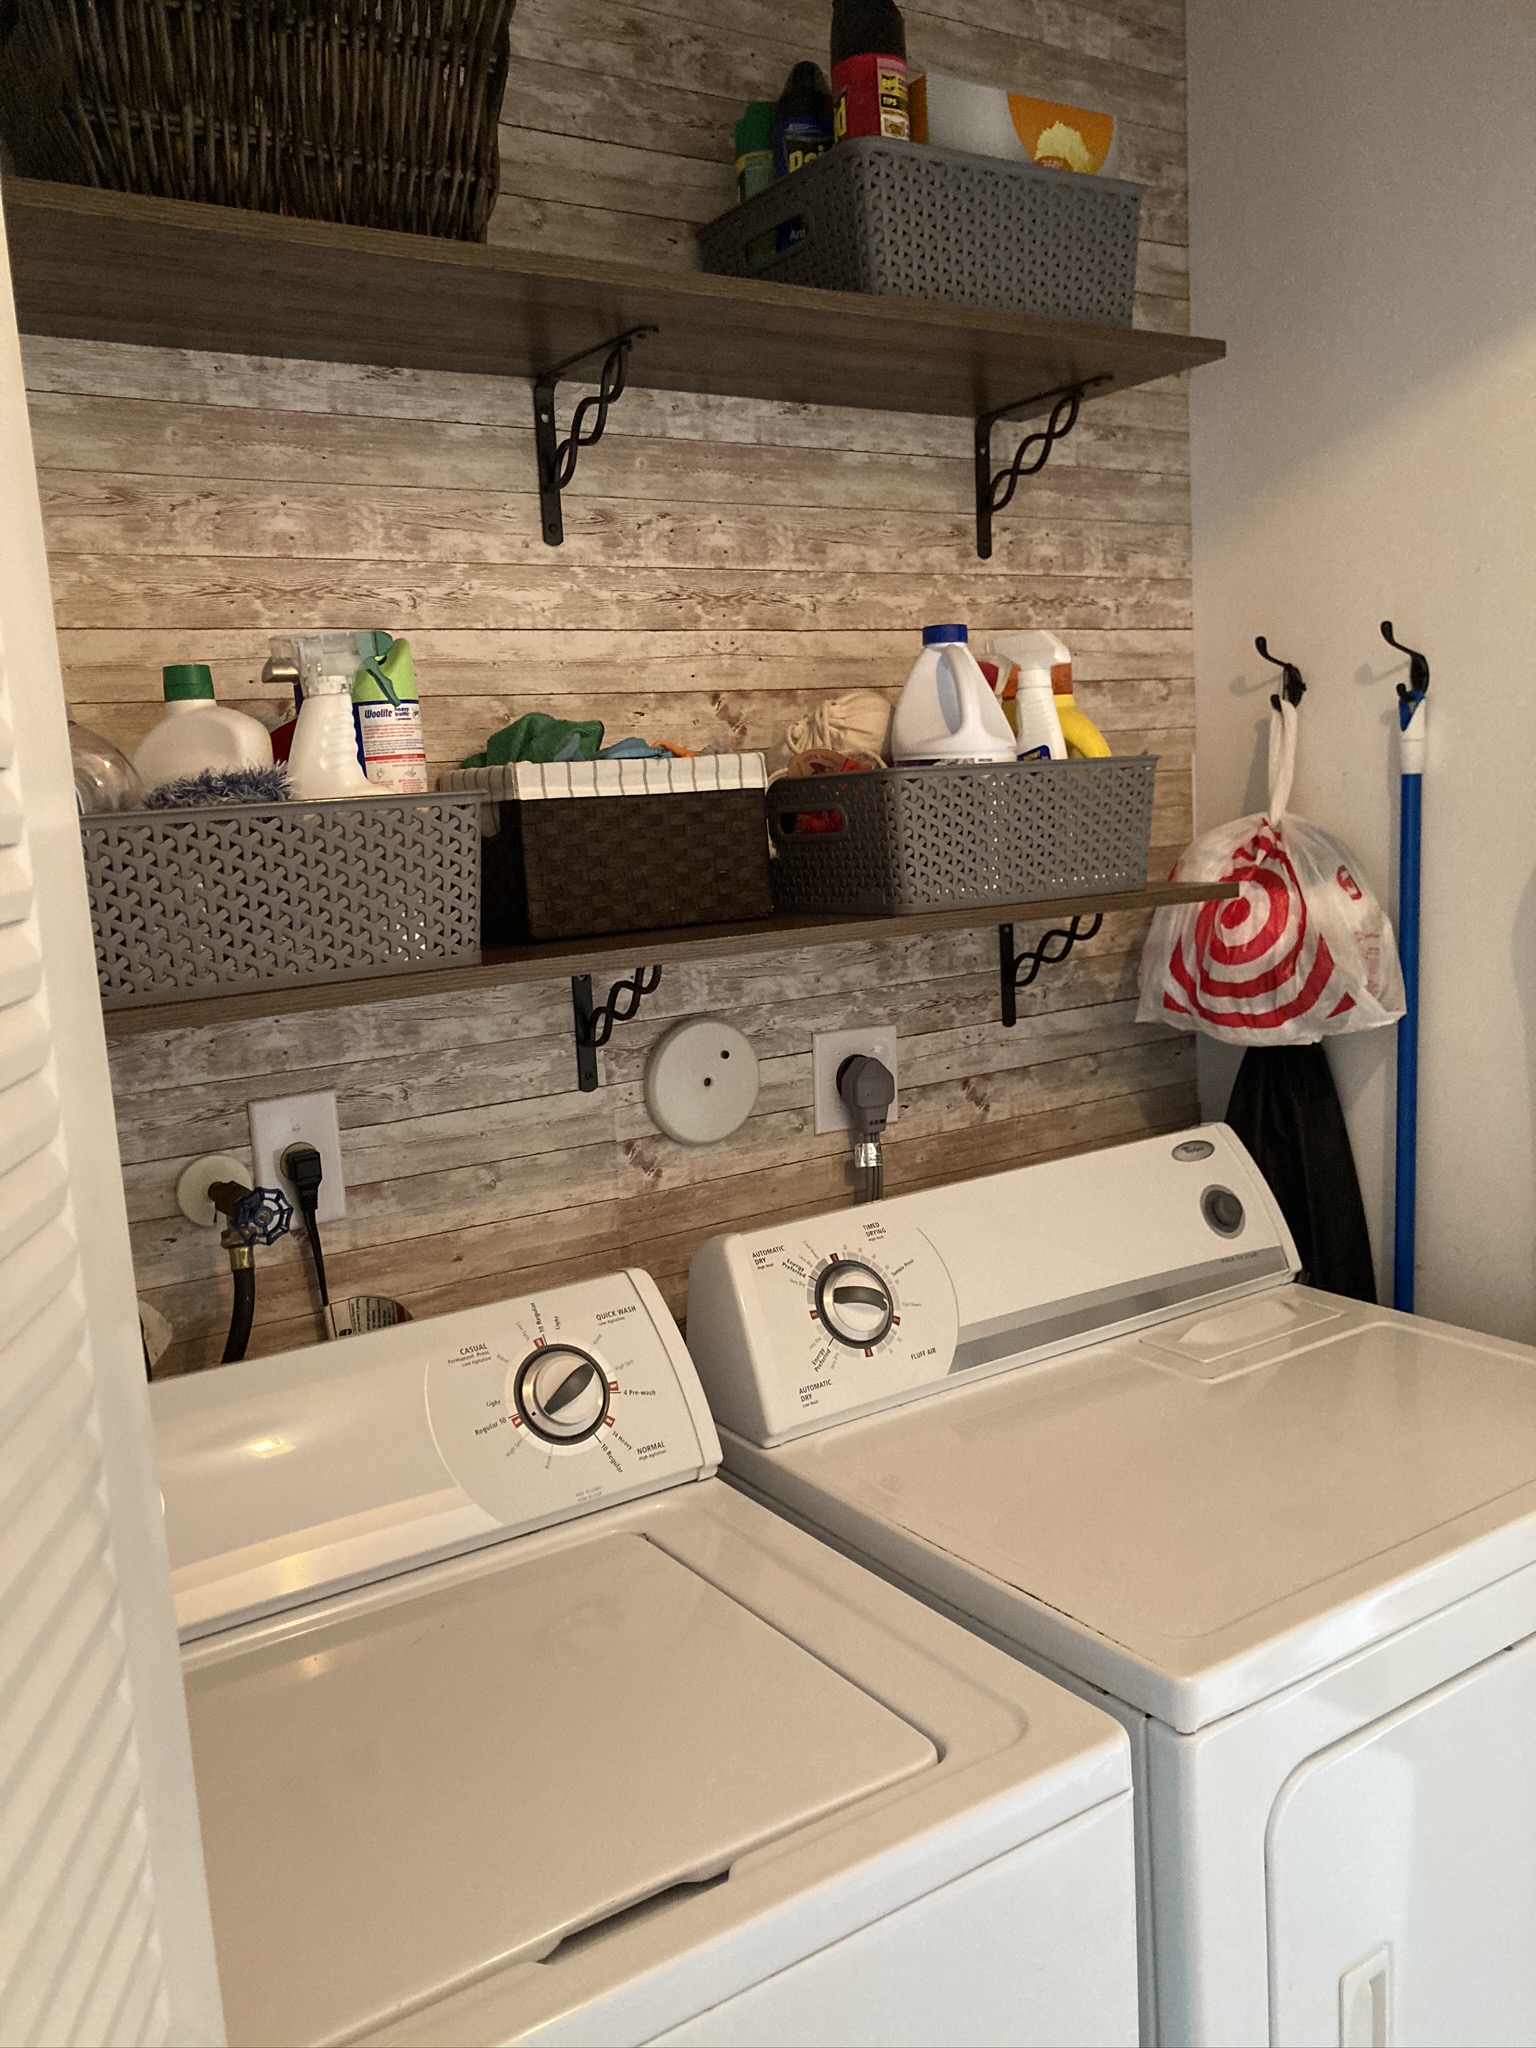
Next was the wallpaper. I didn't stop to take pictures of the process because it was hard and tiring. Thankfully my son E helped me with this. Word to the wise: don't try to do this without some help. It will go much easier if there are two people working on this. The wallpaper is also peel and stick; similar to contact paper but not as stiff. It is, however, extremely sticky and will stick to itself. On the bottom left hand corner there where it looks like a piece is missing? That's where I didn't move fast enough, the paper stuck to itself, and when I tried to unstick it, it tore. That was the hardest part. Of course the walls aren't square or straight but we managed to get the paper pretty level by drawing a line on the wall to follow. Even cutting around screw holes and fixtures was pretty simple. This paper is meant to look like wood boards, unpainted shiplap if you will. When I put up the first shelf to see how it looked, I did a happy dance! 

The wallpaper wall is an accent wall. I didn't want to wallpaper the entire closet; that seemed like too much. Once the second shelf went in and we put up the outlet covers, the washer and dryer were ready to go back in. Oh my gosh, I was so happy and excited! It looks so good! What an improvement from what it looked like before!

I know it's only wallpaper, but the difference is night and day. It's exactly what I wanted.

I put everything back on the shelves and I'm loving it! I might eventually switch out the plastic gray bins for wood ones. These were my daughter's from whenever she was teaching, and since she didn't want them anymore I decided I'd use them here, but I think I'd prefer wood or wicker baskets here. I'm in no rush; if I find something at the Goodwill I'll pick them up but otherwise these work fine.

As for the floors...

You just get a little peekaboo, but it makes me smile every time I look at it. There's space in between the washer and the dryer, so I'm glad I tiled the whole floor, otherwise it would have looked terrible. 

This whole project cost me under $65 but to me, the transformation is priceless. It proves that it's possible to have a beautiful home on a budget. Which reminds me, the master bedroom tour is next, and that's gonna show some of my best frugal skills, so come back soon! God bless y'all.

Thursday, May 21, 2020

2019 When God Closes A Door (Part 1)

My childhood was not glamorous. From the time I was born we lived in the South Bronx, aka the ghetto. I remember when buildings were going up in flames all around us; we later found out many of the fires were arson caused by landlords trying to collect insurance on properties they couldn't sell. Our apartment became rat infested, and to this day the very sight of a mouse sends me into hysterics (I'm cringing right now just thinking about it). After much waiting, praying, and hard work on my mother's part, we "upgraded" to the NYC housing projects. It was way better, don't get me wrong, but that doesn't mean it was great. The neighborhood was mediocre at best. At least there weren't any rats.

Throughout my childhood I dreamed of moving out of NY and one day owning my dream home. I knew what it would look like; I'd drawn it many times. For years I believed that home would be in the beautiful island of Puerto Rico where my parents were born and raised, but God had other plans.

In 1986, through a series of events that I may one day document on this blog, I found myself in Central Florida. My aunt and uncle had a home there, and I decided it would be a good place for a fresh start. I'd never been to Florida and knew very little about it, but being young and adventurous I was ready to give it a try. As the plane began to descend and I looked out the window at all the waterways and green areas, I quickly fell in love with what would become my new home.

I'm not going to go into every detail of my life as it started off in Florida. I arrived in Central Florida and found myself moving to South Florida a few months later. I met my future husband in South Florida, my children were born here, and in time we were able to buy my dream home. It was almost identical to the house I'd drawn years earlier, and it was in the neighborhood I'd loved ever since moving here. I was so extremely happy. It was perfect, and I was sure life would be wonderful from that moment on.

Fast forward to 2011. My marriage was falling apart. My kids were leaving for Central Florida for school. I'd believed God was sending us there as well, but that never materialized. The house I thought was going to bring me great happiness was just a hollow place filled with painful memories. I learned something during that time: things don't bring happiness. We can experience happiness anywhere, but true joy doesn't come from possessions. A house, a car, a relationship, all these are great things to have, but if I was going to find true inner fulfillment it would be in Christ alone. I was a Christian, saved by the grace of God, but still seeking happiness in temporary things. As I "walked through the valley," God began changing my perspective from one of desiring to one of gratitude. I could choose to want what I didn't have and live with envy and jealousy. I could choose to wish my life was what I thought it should have been and drown myself in bitterness. Or I could thank God for where I was and where He was taking me. I chose option #3.

I began making changes in my home. I wanted to erase the painful memories of the past. I wanted to come into my home and have it feel like home, a place I wanted to be and not one I wanted to run from. I sold furniture, painted walls, brought in things that made me smile. I would turn this into my dream home after all...


I began in the living room. For my 50th birthday I bought an electric fireplace. I'd never lived in a house with a fireplace, but I'd always thought they were beautiful and made a house feel cozy. I didn't care that I'd only use it a few days a year. I found this fireplace at Walmart of all places, for $250. I had already seen what electric fireplaces went for and I knew this was a steal. The bookcases that flank each side are also from Walmart, and I paid $60 for each. For under $400 I'd created a focal wall in my living room.

Filling the bookcases with books was no problem; between my daughter, my boys and myself we had enough to load them up and still have books left over. The wall art was a different story. Gallery walls were popular but I didn't like the busyness of them. Still, I needed something to fill up this large wall. I knew I wanted a wall clock but oh my word they're expensive! I didn't want to spend more than $50 total on that wall. I already had the picture of the peony in sepia tone that I'd gotten at Kirkland's for $20 on sale. I went in search of a wall clock that was affordable, large, and that I liked. It was hard to find anything that fit all my criteria, but I finally found it at Big Lots for $21. For the right side I bought these three shadow boxes filled with paper flowers made from music sheets. It was $25 for all three at Target. Normally I don't pay full price for anything, much less at Target, but I felt the price was good since I was getting the set of three. The wall was done, and it was exactly what I wanted.


The living room furniture I'd had for 14 years was sold. The furniture in here changed a few times after that; I put our recliners in here until my son R moved and took them with him. Ultimately I put the sectional that I'd bought for the family room in our living room, taking it from a formal room to a cozy hangout. I bought this sectional at Costco in 2015 and it has held up very well. The price was great too; it was one of two that were left in the store so they'd dropped the price to $799. I had a rebate check which further dropped the price to $650. My favorite thing about this sectional is that it has a piece that allows the sectional to be right or left facing, or can be removed so it's a smaller sectional with an armless chair. The unit in the background I found on Amazon and I fell in love with it from the moment I saw it. It has that rustic looking wood that somehow blends in with the darker woods, and it has storage on the bottom which the previous piece that was there didn't have.


The chair and ottoman were free; my daughter's best friend (and matron of honor) was getting rid of her furniture and offered it to my daughter A. She asked if I wanted it and I said sure! It's fake leather in espresso but it's comfy, and with a blanket thrown over the back it looks kind of farmhouse. While my house isn't decorated in full farmhouse decor, it does have some touches of farmhouse. The jumbo rug is from Costco and was also bought with my rebate check, so I only paid $80 for an 8'x10' soft, cushy rug. I kept the coffee table and side tables along with the lamps that we'd bought even before my son E was born. The picture over the sofa is from Kirkland's. I paid $35 for it, more than I normally pay but it was perfect for that spot. 

While I was married, this room was a pass-through. No one ever wanted to sit on the uncomfortable sofa and loveseat that were here, and with a fully functional family room it felt like wasted space. By adding new comfy furniture and the television with fireplace, it became usable space. This was the first of several transformations that I'll be documenting here. Yep, there's more to come!